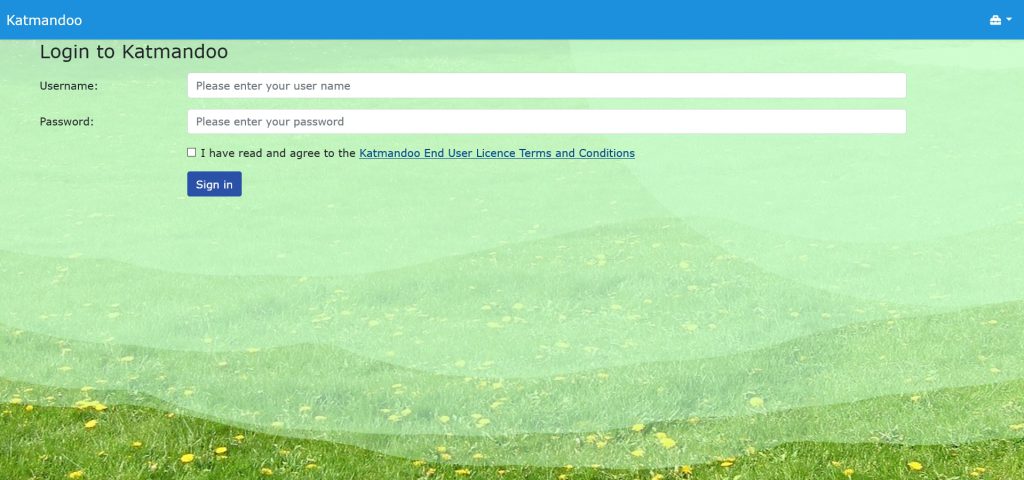
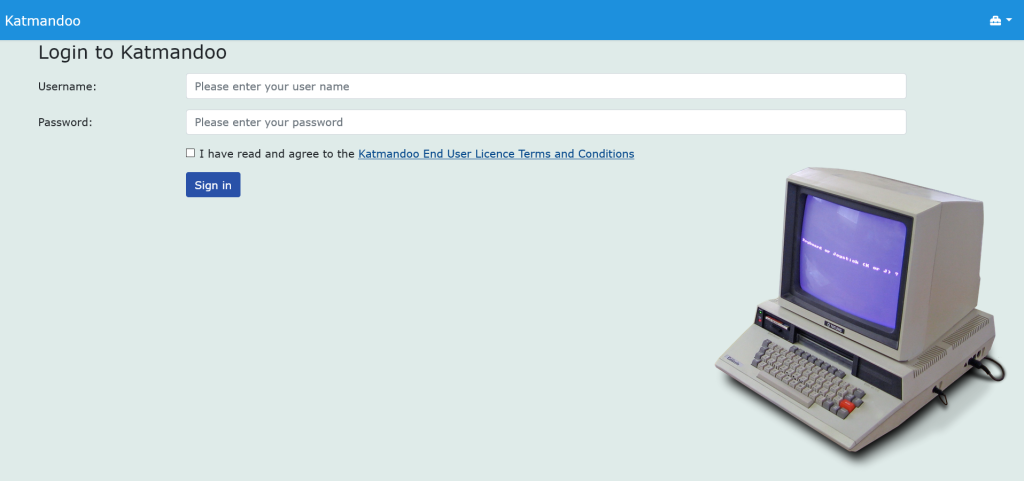
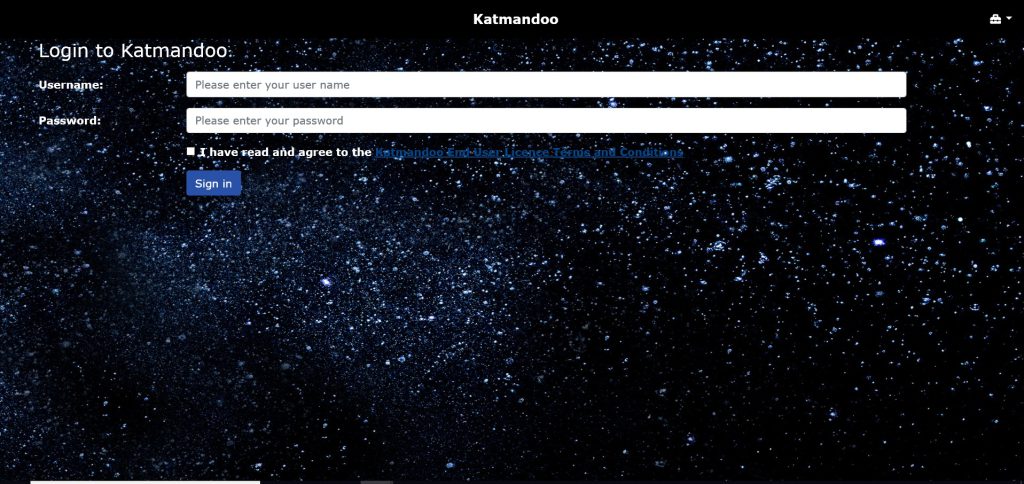
If using Katmandoo in an environment with multiple servers it can be useful to give each server its own unique login page. This helps identify which server a user is on, while also providing a sense of uniqueness.
To achieve this, Katmandoo has two in-built files that allow for customisation, Custom.css and Custom.js. These files can be used for customising all of Katmandoo, but more specifically the login page.
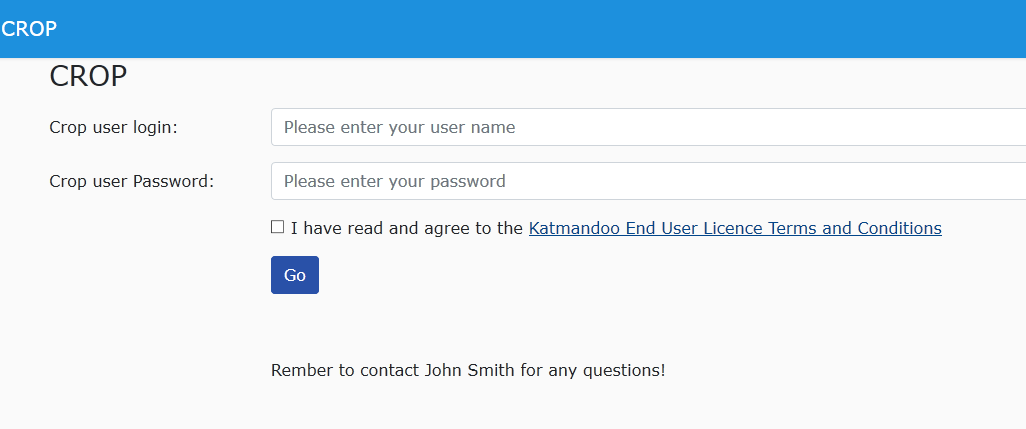
Customising the text on the Login page
To save time or understanding, download this template file and change the text where it says.
Then put it in the custom folder and rename it to custom.js
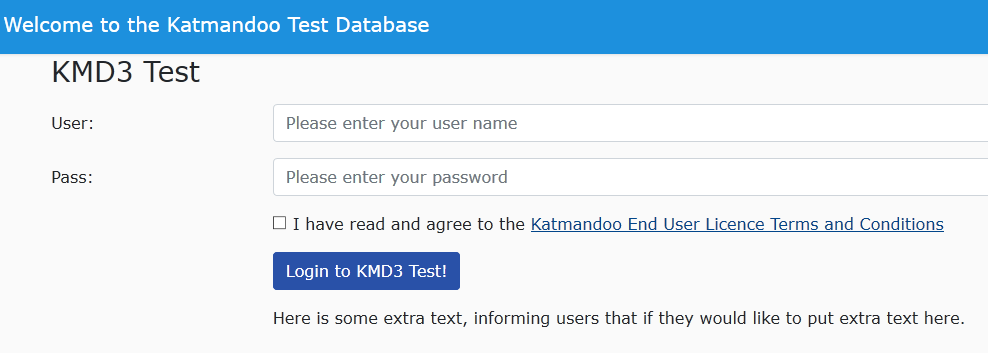
All of the text on the login page can be adjusted to say anything. As an addition more text can be added to the page to allow for custom messages or extra information about the server. Both of these methods are done by making adjustments to the Custom.js file which is a file containing javascript, a programming language with the ability to edit web pages.
All the content on the Login page is built using HTML (as most web pages are) where everything is split into tags. If Javascript is given an identifier for a tag, it is able to tap into these tags and adjust their content.
For the login page there is a unique identifier set for all of the text that can be adjusted. Here is a table
| Area | Default Text | HTML Identifier |
| Branding in top left | Katmandoo | navbar-text-top-left |
| Login Message | Login to Katmandoo | login-main-header |
| Username | Username: | username-label |
| Password | Password: | password-label |
| Sign In Button | Sign In | sign-in-button |
| Empty space below | login-extra-text |
Basic Javascript
To use Javascript to tap into these tags and change their content, there is two main steps. First a variable must be given a name and pointed to the HTML Identifier for what is getting changed.
This is done in a line like this:
var YOUR-VARIABLE-NAME = document.getElementById(“THE IDENTIFIER”);
So a real example looks like
var newLoginText = document.getElementById(“login-main-header”);
Then once the variable is created and it is assigned to the Identifier, its “InnerText” is what is changed to alter the text.
This is done like this:
YOUR-VARIABLE-NAME.innerText = “NEW TEXT MESSAGE”;
So a real example looks like
newLoginText.innerText = “Welcome to the Test Database”;
Putting the code to work
To have Javascript actually run the above lines it needs to exist in a function, but on top of this that function needs to know on what conditions to run.
For simplicity the code for this is provided below:
$( document ).ready(
function() {
customName();
}
);This is telling the system to run the function called “CustomName”, when the document (webpage) is ready (loaded)
function customName(){
if(window.location.href.endsWith(“Login”)){
// PUT CUSTOM CODE HERE
}
}This is declaring the function “CustomName”. The following line is telling the system to only run under it if the URL (window.location.href) Ends with “Login” (Only happens on the login page)
By putting in the custom code between the two curcly brackets ( { & } ) where it says “PUT CUSTOM CODE HERE” it will run the custom code and the text on the Login page will be altered.
NOTE: Every line in javascript needs to end with a SEMI COLON (“;”) like in the examples. This signifies to javascript that a line is over and to start a new one.
Examples
The exact code that makes those edits in the Custom.js file are both available to download above
Customising the style of the Login page
Much like how all of the text on the login page can be adjusted to say anything, the look (Or style) of every element on a webpage can also be adjusted. This is done using CSS a programming language that is simple enough for a user but very powerful for a developer. So to adjust the style the Custom.css file must be edited. Just like with the custom.js file the CSS taps into the HTML identifiers.
This guide is only going to focus on tapping into one of these identifiers called; “login-page-body” which is something known as a class. This identifier is set to match up with background of the login page.
Within CSS there are multiple options (not all will be covered here) for styling backgrounds but the two main important ones are about changing the background colour and adding (and styling) a background image.
Basic CSS
To make adjustments to the “login-page-body” in CSS (which is a class) we have to address it with a full stop at the beginning and then ‘open’ it with curly braces.
.login-page-body{
}
Now within these curly braces is where the CSS goes to adjust the style. CSS follows the same format where on a given line there is the CSS code (a predefined set of words and commands) followed by a colon (“:”), then the desired value and then ended with a semicolon (“;”);
So as an example to change the background colour would be done as follows.
.login-page-body{
background-color: red;
}
NOTE: CSS is done using American English and as such the word colour is spelt color.
Here is a table of useful CSS commands that can be used for styling the backgrounds
| background-color (Note: The American Spelling) | Set the colour of the background using ether – Predefinied Colour names (Eg, Red, blue) – RGBA value (EG, rgba(201, 76, 76, 0.3)) (where R=Red,G=Green,B=Blue,A=Alpha[transparency]) – Hex value (#123ab2) |
| background-image | Set a background Image using its location url(“../images/YourImageExample.png”). (This URL will work if you put the image in the wwwroot/images folder) |
| background-repeat | What gets set for this value specifies how or if the image repeats. By default it is set to repeat horizontally and vertically Setting “no-repeat” will show the image once |
| background-attachment | This property will set whether or not the image is in a fixed location or not. By default an image is set to scroll with the page Setting “fixed” will put the image in a fixed location |
| background-position | The location of the background image is set using these options. While the position can be set in several ways, the easiest is to use the x and y percentage values. The first percent value supplied is the horizontal value, with 0% being left and 100% being right The second value supplied is the vertical value with 0% being the top and 100% being the bottom |
| background-size | This property sets the size of the background image. The first value supplied is the width in pixels. The second value supplied is the height supplied in pixels |
NOTE: To have an image stretch set the background-size to: “100% 100%”
ALSO: Any two values shown like “x y” must be SPACE SEPARATED, a comma will cause issues and the system will not think anything is wrong
Here are some examples of what could be done to the CSS although most users will probably want a simple background or image.