In Katmandoo the most powerful way to add/edit large amounts of data at once is by importing data from a spreadsheet.
The system will only take a file with the type; .CSV or .XLXS/XLS anything else will be rejected.
To begin an import there are two points of entry. There is a global button on all pages on the left in the sidebar. Expanding out any sections will give the option to import.

There is also a button that allows for importing Data on the search page.


Just like with the add button, both will go to the same location, they are just in multiple locations for convenience
Import Options
The import page for all data will have two different ways for selecting the file to use for the import.
The first option, “Select Import File” gives the option to select a file from any of the previously uploaded files to the system.
If running an import for the first time, this should be empty. However if there are too many files, there is also a “Clear Button”

The other option allows files to be directly uploaded from the device Katmandoo is currently being run on.
On the import page there is also a button that will automatically generate a template XLXS file that has all the relevant headers for that piece of data. More information is on this Below
Quick Tip: There are special “locks” on all pages with extra options, click here for instructions on them
If an XLS or XLXS file is uploaded the system will come with another prompt if the spreadsheet has more than one sheet.
Once a sheet is selected and the “next” button is pressed the system will show all of the headers from the file and try to automatically map them to Columns in the Database.

If a CSV file is uploaded or if an XLSX /XLS with only one sheet in the spreadsheet, the system will skip the prompt for choosing the worksheet and will show the headers with their relevant mapping.

The system will try to match the column headers to the database fields automatically, but If there are any columns that need to be uploaded that are red and have a cross next to them, it means that they are not mapped to a database field and need to be set manually.

By clicking on the dropdown that says “–Not Mapped–“ the system will show all of the database fields that are linked to the relevant data. It also includes all the aliases of them as well.

The system will also show at the top of the page how many columns are mapped out of how many can be mapped.
As well as letting the user know which columns are needed for mapping and if they made any of these duplicates

If all of the required fields have been mapped to databases and the next button is hit, the system will go to a preview page where everything can be checked for confirmation.
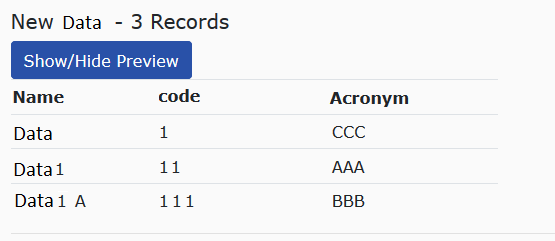
If there are new records being added to the database, the system will preview a small table showing some key information that is going to be added, as well as the amount of new records that will be added.
If there are any records being updated, the system will preview a similar table to the new records preview, but just below the add preview. The Update preview will also give the number of records being updated.

After hitting save, the system will attempt to make those changes to the database returning a positive message on the home screen if it was successful.

Import Templates
Once clicked on, the download template button will appear as a popup similar to the export popup with only one option, the ability to use templates.

The only major differences in functionality from the standard export are the buttons and pages with traits and measurements.
To start there is no button to bring all to the right, but the same can be achieved by holding shift, selecting all and pressing the first “to right” button.

There is also a change in functionality on how the export button itself also works as well the the Quick Template button next to it.
Hitting export with the export columns section full will operate as the normal export would, however if the export columns section is empty, the template export will still go ahead. Unlike the regular export which would export a blank spreadsheet. The template export will export a spreadsheet that has all of the key columns needed for the import, but nothing extra (the bare minimum required for the import).
Alternatively there is the above mentioned quick template button. This button functions in a similar was to pressing the export button with no export columns, however this has the exception of grabbing the optional columns as well.

The last difference between a regular export and the template export would only be seen if on a page where there are traits or measurements (import measurements, etc…). On the left, in the available columns section, the options are split up. In this example for importing measurements it can bee seen that there needs to be at least one Unit Position and some traits. However, there are some optional columns (factors) as well (which can be hidden with the button below)
The template has two sheets with the first one where the headers are located and where data would be inserted. The second sheet merely has all the information surrounding the headers and any factors.