Searching for an location
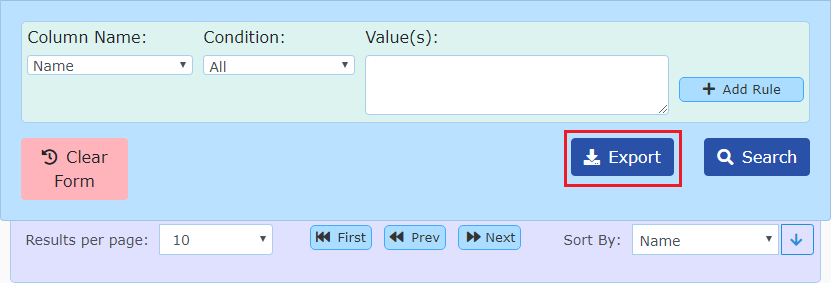
Searching the database for location records requires 3 fields. A column, a condition, and values. Clicking the search button will build the query based on the selected fields and will produce a table of results below the search box.
Quick Tip: To perform a quick search for all location records, simply click the search button after the page loads. This will run the search using the “All” condition.
There is another way to search for locations. By going to the “Location Map search page” The system allows the searching via drawings and geometries.
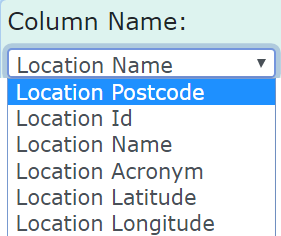
To perform a filtered search, select a column to filter using the Column Name drop down.
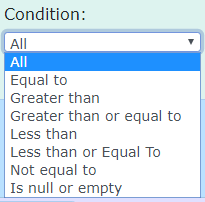
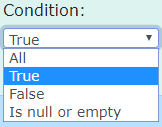
After a column has been selected, select a filter condition to apply to the column. The filtering conditions available in the drop down are based on the based on the data type of the selected column name option.
Search Field Data Types
Text
String – Alpha Numeric
Eg. locationName

Number
Decimal or Integer
Eg. locationId
Boolean
True/False Value
Eg. IsLocationInAustralia
Date
Date/Time Value
Eg. locationStartDate
Changing the condition to “All” will clear any values entered for that rule.
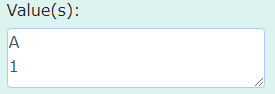
With a Column Name and a Condition selected the values need to be entered to search for.
The Value(s) text box allows multiple line separated values. Entering multiple values works applies and “Or” operand to the filter.
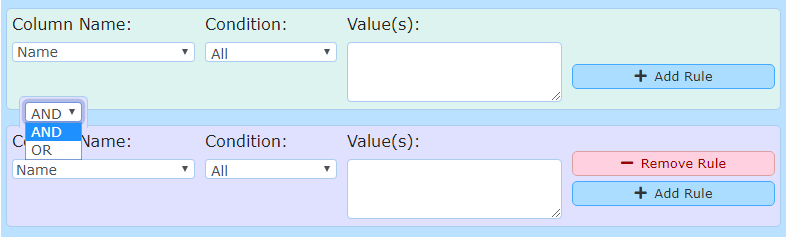
To refine the search further, additional search rules can be added using the “Add Rule” button. This button adds an additional filter row to the search input area with the same selections as the previous row.

Additional filter rows provide “And/Or” operands to separate filters. The order of operands may have an impact on the resulting data set.
Additional filter rules can be removed using the “Remove Rule” button. To reset the form click the “Clear Form” button.
Search Controls
After a valid search has been completed, a table of results will be displayed below the search box. To sort and apply paged results additional search controls are available below the filters.
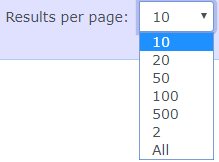
For a default the table only shows 10 Results per page. This can be adjusted by changing the dropdown and choosing a new value
The table will also be displayed with pagination (split into multiple pages). To navigate between the pages there are three buttons that allow to move between pages.

Hitting the “First” Button will go to the first Page while the “Next” and “Prev” buttons will go to the next and previous page sequentially.
The page number of the page being displayed will be shown on the right of the table, just above it.

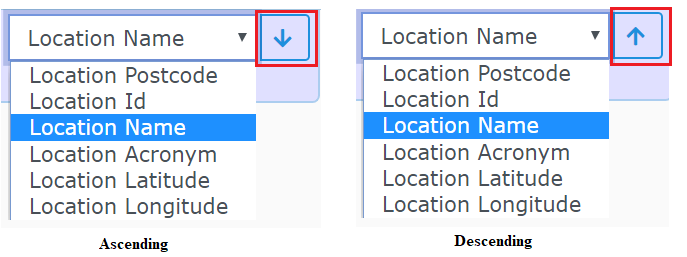
The table also gives the option to change how it is sorted. If the “Sort By” dropdown is selected it allows the choosing of one of the Column Names to search by. After the desired Column Name to search by is selected the order (Ascending or Descending) will also need to be specified.
This is set to Ascending by default as represented by the “Down Arrow”. Selecting this Arrow button will change the arrows direction while also changing the order.
The table will not update until the search button is hit again.
Adding an location
In Katmandoo 3 there are two ways of adding an location, through Importing and through the search page.
While on the search page, there is a button in the top right labelled “Add Location”, selecting this button will take the system to the Add page.

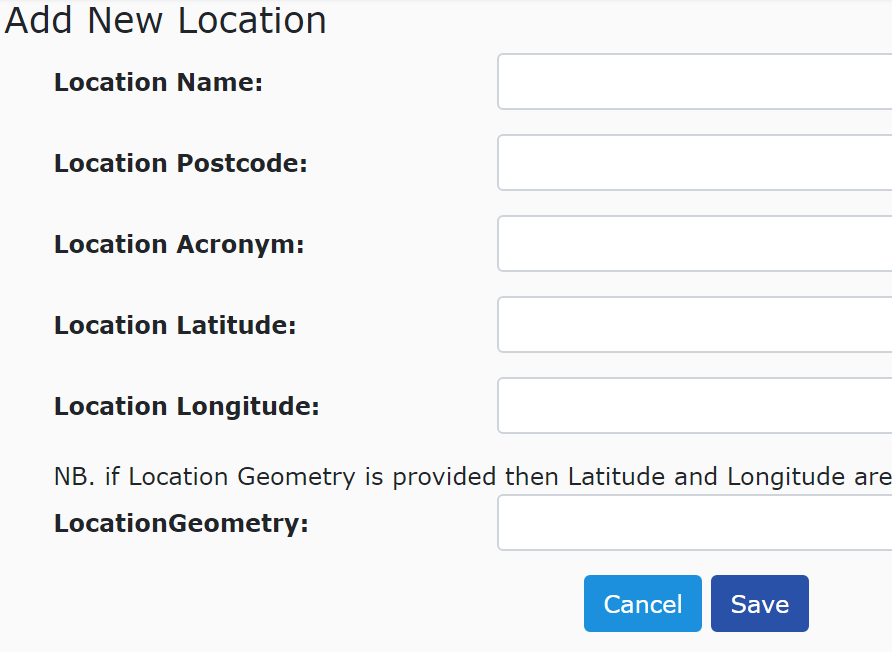
While on the Location add page, by default there will be six fields to enter data into.
The first three listed, Location Name, Postcode and Acronym are required fields.
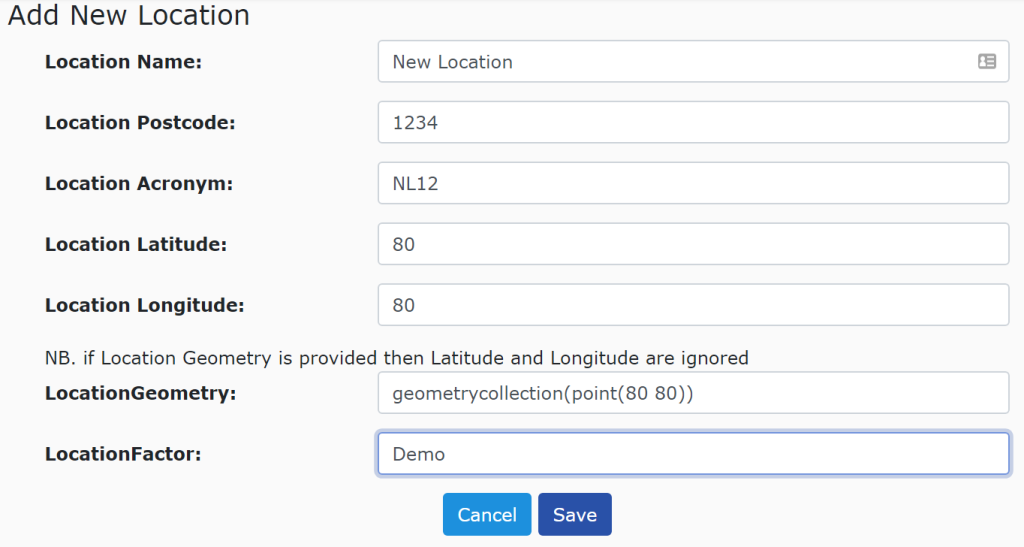
The three fields below them, the Location Latitude, Longitude and Geometry are optional, but they also operate in a special way.
If a Location latitude or a Location Longitude is entered, the program will automatically generate a Geometry based on the latitude and longitude. Both a valid latitude and longitude must be entered for the geometry to be saved.
Please Note: That if there is already data in the Location Geometry field, entering or adjusting either the Latitude or Longitude will override whatever is in Location Geometry.
However if there has been a factor (or multiple factors) created for locations, then there will be more fields to enter data into.

After the Location data is supplied, hitting Save will add it to the database
If it was successfully added to the database the system will redirect to the View page for that Location
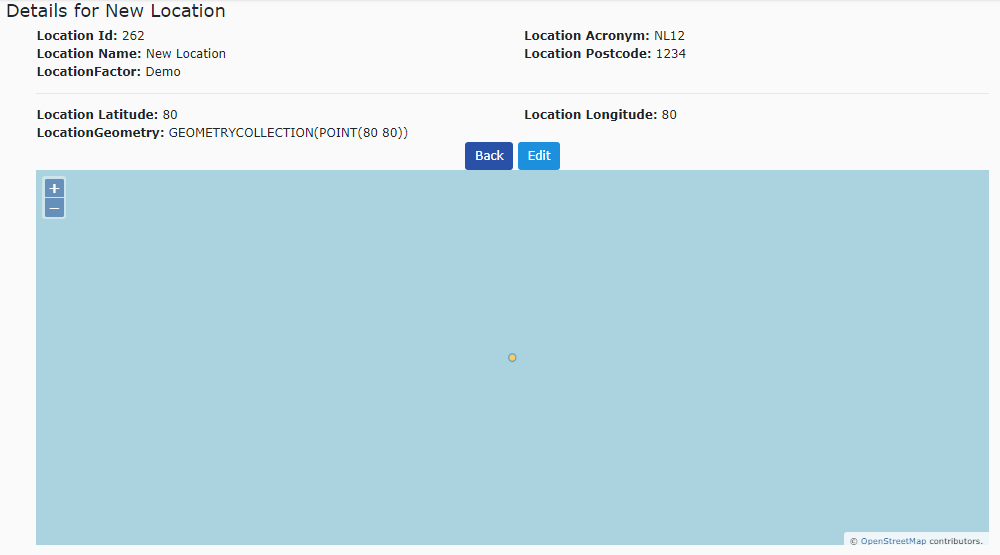
Please note that the Id will be different depending on how many locations have already been added.
Editing a location
To make a change to an location in the database it must be done through the Edit Page.
To get to an location’s edit page it must first be found in the database. Using the search methods above the location will appear in the results table on the search page.

On the rightmost column of the location there is an “eye” icon. Clicking this will take the system to the view page for that location.

On this view page, there are three buttons.
The first button will go back to the Location Search Page. The Last button will go to the Location Map-Search Page.
And the Edit button, which goes to the edit page for the current Location.

As with the add page, the edit page allows for the addition of factors. On the edit page location factors can also be edited
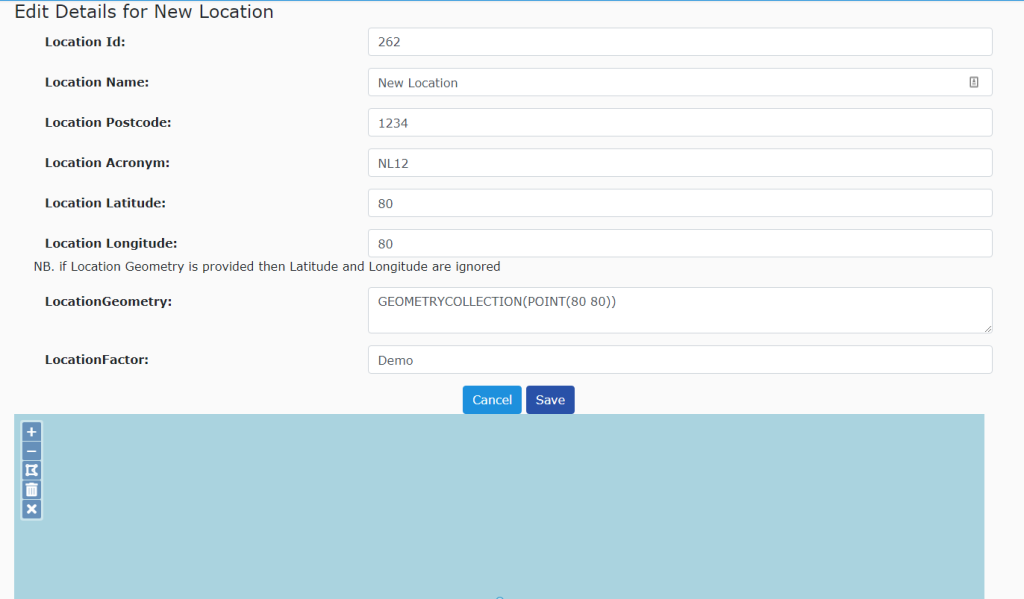
The edit page looks similar to the add page, but with the addition of the Location Id and the map below.
While there is only one way to adjust the fields for a location, there are two ways to make an edit to a location’s Geometry in the database, either through the forms on this page or through the Map edit page
Click here to be taken to detailed Help for the Location Map Geometry Edit
To make an edit to that particular location, alter the fields and hit save

If the database was successfully updated the system will return back to the view page for that location and the changes that were just made should be visible.
Importing locations
In Katmandoo there is the ability to add multiple locations all at once by importing data.
The system will only take a file with the type; .CSV or .XLXS/XLS anything else will be rejected.
To begin an import there are two points of entry. There is a global button on all pages on the left in the sidebar. Expanding out location will give the option to import locations.
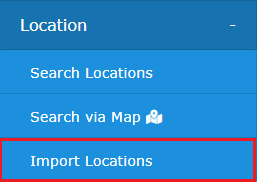
There is also a button that allows for importing locations on the search page.

The import page for Location will have two different ways for selecting the file to use for the import.
The first option, “Select Import File” gives the option to select a file from any of the previously uploaded files to the system.
If running an import for the first time, this should be empty.
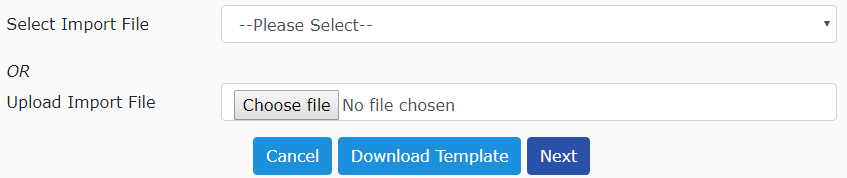
The other option allows files to be directly uploaded from the device Katmandoo is currently being accessed on.
On the import page there is also a button that will automatically generate a template XLXS file that has all the possible headers for locations.
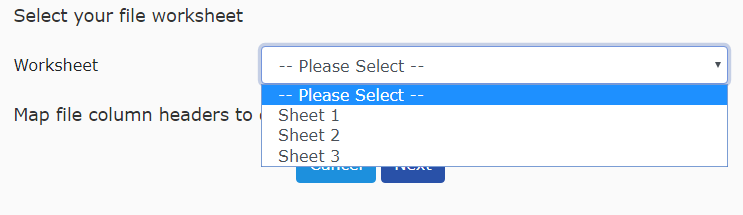
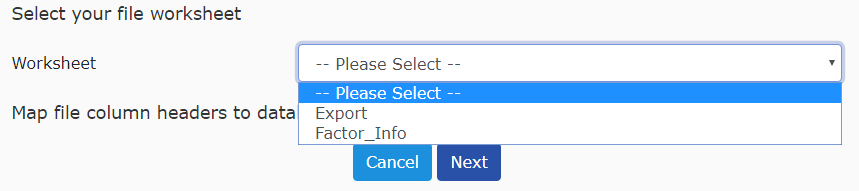
The template has two sheets with the first one where the headers are located and where data would be inserted. The second sheet merely has all the information surrounding the headers and any factors.
If an XLS or XLXS file is uploaded the system will come with another prompt if the spreadsheet has more than one sheet.
Once a sheet is selected and the “next” button is pressed the system will show all of the headers from the file and try to automatically map them to Columns in the Database.
If a CSV file is uploaded or if an XLSX /XLS with only one sheet in the spreadsheet, the system will skip the prompt for choosing the worksheet and will show the headers with their relevant mapping.
The system will try to match the column headers to the database fields automatically, but if it didn’t there it can be done manually.

If there are any headers that need to be uploaded that are red and have a cross next to them, it means that they are not mapped to a database field and need to be set manually.
By clicking on the dropdown that says “–Not Mapped–“ the system will show all of the database fields that are linked to Location Table in the factors (columns). It also includes all the aliases of them as well.

If all of the required fields have been mapped to databases and the next button is hit, the system will come up with confirmation.
If there are new records in the data base the system will number the amount of new records it will be adding.
If records a just being updated then the system will give the number of records being updated also.
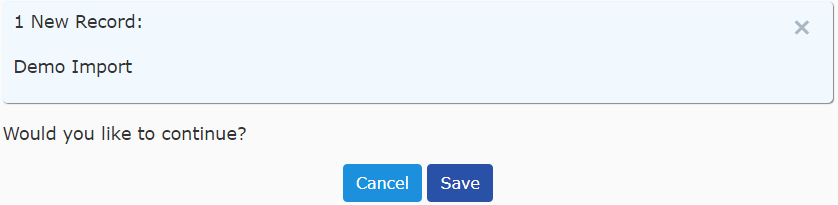
After hitting save, the system will attempt to make those changes to the database returning a positive message on the home screen if it was successful.

To confirm that the import was done without error. Go to the Search Page and run a search for the newly imported locations
Exporting Locations
On the location’s search page there is a button for exporting data.
By clicking the export button a the system will generate a pop-up
The export Location Data pop-up has several buttons and drop-downs with some being more useful than others.

The first drop-down cannot be changed as there is only one Export type for location

There is an option to choose an export template with the two default ones being, all columns and no columns.

Under the heading “Available Columns” there is a full list of all of the available columns for export.
To choose what columns are needed the blue buttons in the middle are used for this navigation.
Please note that by holding in shift multiple Columns can be selected at a time
| This button moves the selected available column to the list of Export Columns | |
| This button will move all of the available columns to the export columns Please note that for large amounts of columns the system may take time to load |
|
| This button moves the Export Columns out of the list of Export Columns |
|
| This button will move all of the export columns back to the list of available columns |
|
| This button will move all of the selected columns up in their order |
|
| This button will move all of the selected columns down in their order |
There is also an option at the bottom of the window that is prompting for a file format to export to.
By default this is set to be a CSV file, but it can be changed to be a XLSX file.

Once a set of Export columns are selected, hitting the “Export” button will allow the system to download the exported file.